Overview
For this project, you will create a repeating and interlocking pattern based on the Adult Coloring Book craze. These types of pattern are also often used in textile design for fabrics and wallpapers.
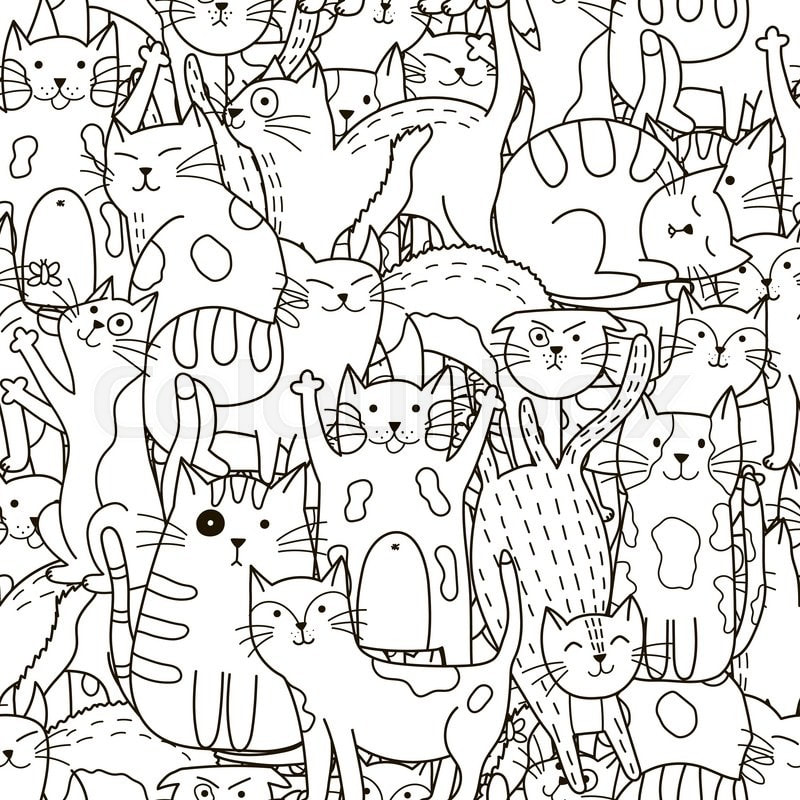
The adult coloring book fad starting in the early 2000's resulted in a wide range of styles and coloring pages. Some were pattern driven, others inspired by madalas, animals, flowers, zentangles and more. There are some common characteristics that almost all of the designs shared. They were intricate and busy designs, easy but time consuming to color, and meant to be a calming or even meditative activity. Some sheets at the beginning of the fad included funny or inspirational text as well.
The Videos below will show you how to make a tile that you can trace multiple times to create an interlocking repeating pattern. While the steps in the video are accurate, they are using a different sized paper than we are so be sure to use the paper specified in the materials section.The videos linked in the resource section are optional. You must at least watch the youtube video below though.
Your final pattern should
- have a clear theme
- have a variety of line weights
- be intricate / take time to color
|
Resources
|
Materials
3x4 inch copy paper (measure and cut) 9x12 mixed media paper (provided) pencil, sharpie, marker, colored pencils
| ||
Now that you have an idea for how this works, think about what you want your pattern to look like. It can help to have a theme. Think about what types of images appeal to you? You should also take into account what types of designs or objects you enjoy drawing since You will have to draw these objects multiple times. Is your design floral? Geometric? Character driven? scroll through the ideas below and when you are done loosely sketch out your idea for your beginning pattern tile.


Step by Step Instructions
You must watch the video for this project! These steps are just meant as a reminder and clarification. This will sound super complicated if you have not seen this process happen from start to finish! Remember- your pattern should have a theme and variety of line weights. These steps are directly from a skill share and while they do somewhat explain the video they cannot replace it
1.Start in the middle of your small piece of paper (3x4) Use a pen since it will photocopy/trace best, or start with pencil and trace over your lines. Most importantly, do not touch the edges of the paper!
2.Cut your drawing in half. (I know, this is scary! You can do it. Remember you can always copy, scan, or photograph your original for safekeeping.) Once you have your two pieces, flip them so the original outer edges touch, back to back. Then, tape your two halves together. Tape on the backside so your drawing stays clean.
3. Repeat: cut (the other way), flip, tape. Rotate your page, and cut it in half again (the other way, so that the two cuts form a cross). Flip these two new halves, and tape them back together. Again, the tape should go on the back.
4. Draw in the blank spaces.
Since your design is now on the outer edges, you're likely seeing a big blank space in the middle. Fill it in! Draw in all the empty bits and finish your drawing. As before, don't draw on the edges.
When you're done drawing, step back and admire your work. This is your repeat tile.
5. Trace your tile to fill your 9x12 piece of paper.
We will be evaluating each sheet and choosing the very best to make it into the coloring sheet rotation for folks that finish early :)
| textile_pattern.docx |
