Practice
Posterized Portrait
Now that you have reviewed color mixing and color schemes we can move on to practicing mixing different tones, shades, tints and hues. For this project, you will need to choose a color scheme. Go through the images below and see if you can identify the color scheme used in each painting. Can you identify the types of colors used? Try to find examples of complementary and analogous colors. See if you can find examples of tints, shades, and tones of a single color. Are there any paintings that don't fit one of the color schemes we discussed?
Now that you have reviewed color mixing and color schemes we can move on to practicing mixing different tones, shades, tints and hues. For this project, you will need to choose a color scheme. Go through the images below and see if you can identify the color scheme used in each painting. Can you identify the types of colors used? Try to find examples of complementary and analogous colors. See if you can find examples of tints, shades, and tones of a single color. Are there any paintings that don't fit one of the color schemes we discussed?


|
Before you start painting, you need to use your ipad take a high contrast photo (bright highlights and dark shadows). Your photo should be from the shoulders up to make sure that your shapes will be big enough to paint. You will then change that photo to black and white using the edit function. If your image is mostly midtones of gray you can bump up the contrast in this step. Once you have a high contrast, black and white photograph, use the photopea to create a posterized image. You can also use the grid app to grid your photo, just make sure that it is cropped in 2:3 ratio so that it matches the size of your paper.
Once your photo is ready to go, grid your paper and draw in your shapes. Once you are done, you will then use your chosen color scheme to fill in the shapes. You are required to use tints, shades, and tones somewhere on your painting for full credit. You may also blend hues to create any analogous colors you might need. Check out the examples below for inspiration. See if you can identify the color schemes and color types the artists used in each of these paintings. |

|


Project
Now that you are comfortable with how to mix and apply your colors and values, you can move on to creating your own original painting. Your painting just has to meet the following requirements:
The photo galleries that show different types and styles of acrylic paintings to help you determine what style you might like to paint in as well. Feel free to paint in a style that is not pictured here as long as it demonstrates the skills listed above. Check with me before moving forward. No matter what style you choose, you must use and combine your own photo sources to create an original piece of art. You should never copy someone else's painting, character or design.
- demonstrate deliberate application. This means you will need to have smooth, opaque application. It shouldn't be patchy or streaky. Your brushstrokes can be visible as long as they look intentional, show direction or form and you cant see the paper underneath. This Van Gogh's Starry Night if you need an example of acceptable use of brushstrokes.
- demonstrate the ability to achieve gradual shifts in value and/or color.
- show control. This means you keep your edges sharp when necessary. I should be able to identify your object(s) from your source images
The photo galleries that show different types and styles of acrylic paintings to help you determine what style you might like to paint in as well. Feel free to paint in a style that is not pictured here as long as it demonstrates the skills listed above. Check with me before moving forward. No matter what style you choose, you must use and combine your own photo sources to create an original piece of art. You should never copy someone else's painting, character or design.
Inspired by: Impressionism
Visible Brush Strokes
Visible Brush Strokes
Check out the time lapse videos if you want to work in this style. These videos show you how to layer your paint so that you can show shifts in value and hue. Notice the deliberate placement of values and colors to show detail in the landscape and show form in the face. You can speed up the landscape video if you need to but it is a great example of how to build up your colors and values. Once you have looked at the videos
|
|
|


Inspired by: Fauvism
Color Fills and Linework
For this style you will need to mix different values and variations of your colors but you can apply them without blending them together. Your shapes can appear 3d because of value placement like in the first image of a girl or the 3rd image of a table. Patterns and linework help break up the simplicity of your larger shapes. Click through each of the images below and see if you can identify any other similarities in the images that can help you further emulate this style. As always, never copy a painting! create your own image in the style by using and combining your own photo sources.


Inspired by: Realism
Accuracy and Blending
For this style you will need to recreate the proportions, colors and values from your photo sources (no copying another person's artwork). You will need to achieve smooth blends and crisp edges to mimic this style. Your objects should have a clear light sources and appear to be 3d. Photo sources should be combined to create an original composition, or you can copy a single photo but only if you took the photo yourself.


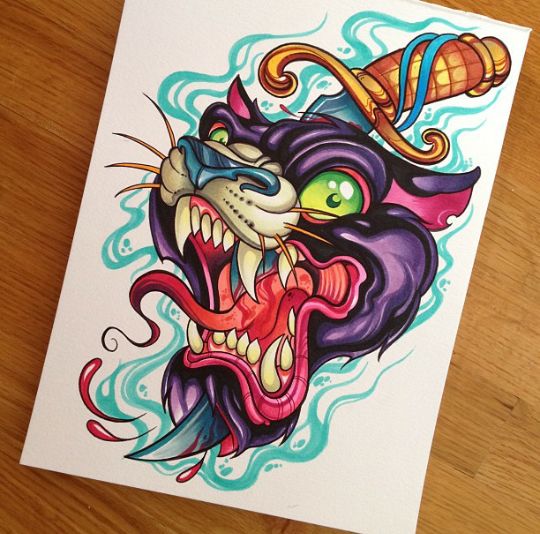
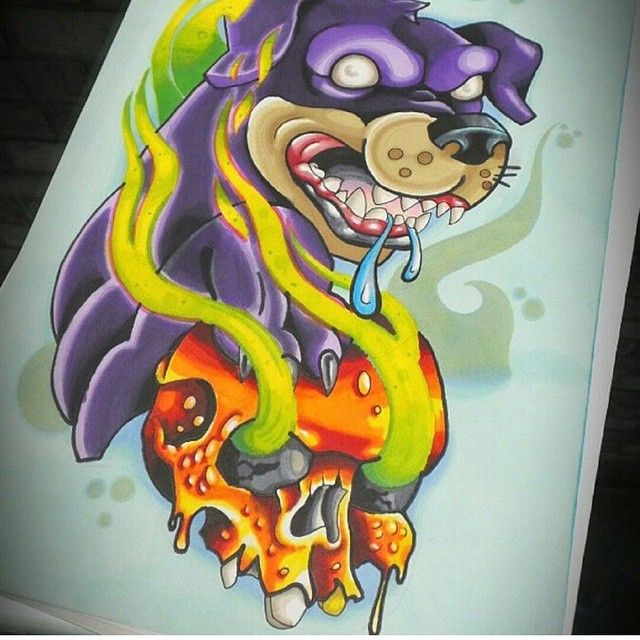
Inspiration: New School
Vivid, Smooth Colors, Exaggerated Proportions
This style uses vivid colors with smooth transitions into bright highlights and deep shadows. Outlines and clean edges help define the shapes, and backgrounds are normally a solid neutral tone so that the images really pop. If you choose this style, be careful not to make your image too small because it will result in too much negative space and an unbalanced composition. New School artists typically use complementary or high contrast colors and warped perspective, so feel free to exaggerate your proportions and choose non local colors. However, you must work from a source photo and alter it on your own. You cannot copy an existing new school design.